Sunday, September 20, 2009

Still more nose work and an engine update

Over the past few days I've spent about 20 hours on the nose of the car. With the new panel trial fit in place I've focused on the driver's side front fender which I'm replacing with a panel I got from the good folks at Alfaholics. After lots and lots of measuring, fitting, measuring, fitting, trimming, measuring and fitting, this is what I have. Not quite there, but getting closer.


I also used a combination of wire brush and Zinc rust condition on the stringer that the nose piece mounts on, followed by a few coats of Wurth self etching primer.


The front has been banged up pretty good over the life of the car so I spent lots of time dollying and bumping the area around the bumper mounts, as well as on the bumper mounts themselves. This is crucial to ensure that the nose panel has proper orientation to the rest of the car. Combined with the stringer between the fenders, they're the only reference I have for getting it straight.

With a spirit level, masking tape, and a measuring tape I spent a good amount of time trying to get everything as straight as possible. There's some damage to the passenger side bumper mount which made it tricky, but I managed to get it within about a sixteenth of an inch of the driver's side mount.

I also ground off old welding material and removed rust from the cross member which the lower part of the nose piece is welded. With that in place I could again fit the nose and start working on that repair panel.


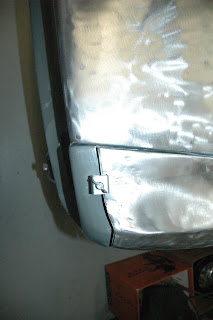
As you can see, the bumper is temporarily mounted in order to make sure that the fenders and nose piece are properly oriented. Assuming that everything will lined up and painting the car is not the right way to approach this. Essentially every component that attaches to the body must be trial fit several times before the car ever gets painted in order to ensure it will be right when the time comes for final assembly.


Here's another picture of the repair panel temporarily in place, during one of the 25 or so times I installed and removed it before taking another 32nd of an inch off the surrounding metal to get the fit right.


As you can see, the crease along the top of the fender as long as the waistline crease are still not lined up properly, so I've still got more work to do.

On another topic, Chel and I finally got around to measuring the valve clearances this afternoon. I was not surprised to find that nearly all of the shims that came with the head were not at all close to the right size. The head has a fresh valve job and the only shims I had were from before that happened, so as you'd expect, the clearances were all way off. At least I have a reference point now, and I know what size shims I need to get to set them properly. On a disappointing note, I could not get one of the studs that holds the rear camshaft cap on the intake size to torque down. The stud is pulling up through the head. I will have to take the head back to my machinist and see if he can install a timesert of do something to prevent it from pulling out. They're only torqued to 15 foot pounds but they need to hold that much torque.

I'm expecting at least 5 or 10 more hours of work trimming and fitting the metal on the nose before I can get serious about welding it, but hopefully I'm getting closer.

Friday, September 18, 2009

More nose work

I'm feeling pretty good about the front end of Chela's Alfa. I've spent about 10 or 15 hours over the past few days removing the original nose of the car. This time I decided to use a flap disc in my angle grinder to slowly grind off the old skin, rather than trying to drill out each individual spot well. Combined with my plasma cutter, a cut off wheel in my pneumatic angle grinder, and a hammer, I was able to get the original sheet metal off without doing any damage to the metal underneath. There is a stringer that locates the top of the nose panel and which has the hinges for the hood attached to it. This needs to stay in place in order to get the nose fit properly.

The nose, despite being a more complex piece, is actually easier to locate than the tail because of that stringer. It locates the entire piece very accurately, and as long as your bumper mount points aren't too bent (mine were) everything should line up fairly nicely. Since our car had sustained numerous concussions to the front end, both bumper mounts were off by about a half an inch, but some gentle persuading with a hammer, dolly and c-clamp reinforced with some square tubing to distribute the load were sufficient to get them in the proper location.


I still have lots of trimming work to do on both fenders, and also will have to graft in the corner section on the driver's side as there was a ton of unfixable damage there.


I am going to check alignment on every joint over and over until I'm sure I've got it proper before I start tacking it in place. But before that I've still got lots of metal prep and bumping to do around the headlight rings and in the sheet metal around the bumper mounts. I'm also a bit puzzled as to how exactly the headlight rings mount. As you can see, I've got the passenger side on in place, but it's just propped there, and I don't think it's in the right position. I'll have to check the pieces I cut out to try to get the orientation and alignment.

Monday, September 14, 2009

Nose and tail

Recent hours in the Cowpoke Racing garage have been dedicated to getting the tail section fitted properly to the body. I'm learning how very tricky it is to get the new piece matched properly to the body. I left lots of room for error when I cut the original metal out, and went very slowly with my angle grinder, taking off only sixteenths of an inch at a time. Obviously taking too much metal off could really make things tricky. The nice thing about this panel is that, provided they're straight, you can use the bumper brackets as reference points for the entire tail section. Also, where the trunk lid closes is a good reference point for the top. What I wasn't certain about was how much overhang the trunk lid has over the tail section, and thankfully my friend Carl sent me some pictures of his very nicely restored 66 Veloce for reference. I also visited a local friend with a 74 GTV so I could see what the panel looks like in person.

My job was made a bit easier with the arrival of some panel clamps that I got from Eastwood. These hold the panel in place, with a very small spacer, which guarantees proper fitment and alignment of the two panels. Here's a picture of one corner of the rear before I put the finishing touches on the metal. As you can see, there's a big gap, one that is too big to weld.
A few more passes with my flap disc and the gap is much closer now. Obviously I am still a few hours away from welding the panel in permanently as I have to remove rust from the trunk floor, prep it with primer and remove the paint from the replacement panel.

Here's a profile picture of the rear, illustrating the overhang with the trunk lid that I was trying to achieve.


Feeling confident in my ability to cut and fit body panels I decided to move to the front of the car. The nose has been damaged so many times that I knew there was no way I'd ever get it straight. I'd been holding off cutting it out because it's a bit complex and I didn't want to cut through the wrong parts. The trick is to leave the upper support piece (to which the hinges mount) in place, which is a little hard as it's spot welded to the entire section. I started at the bottom, with plasma torch in hand, and started removing metal. I've learned that trying to remove whole sections at one time is not the way to go. It's better to take out smaller areas, piece by piece, thus ensuring you don't cut through the wrong part. This front end has been buttered and leaded and brazed so many times it was incredible. Plasma cutting through body filler is interesting. It smokes, catches fire, and turns to good. I know the front end had been replaced, but it looked like whomever did so just laid one nose on top of the other, at least at the bottom. The entire lower valance was double thick metal. It was a dirty, smoky, messy job, but within a half an hour or so, this is what I had.

And this is what I cut out.

I still have to remove the top section, carefully I might add, as the piece beneath it must stay in place. Then I'll start removing rust, straightening the bent panels (and there are a few) before I start trimming more closely for the new panel. I also have a new section for the driver's side corner which will replace the original, very damaged metal. I think that piece will go in before I weld the entire front panel in, but I'm still working on figuring that out.

Saturday, September 5, 2009

Rear end removal

Today Chela and I took a major step in the restoration of our old Alfa. We cut the damaged rear end of the car out. I've been spending a bit of time in the trunk over the past week and after drilling out the spot welds that run along the midsection of the tail panel and cutting the inner brace loose from the trunk floor we were ready. I clamped my new replacement panel on the rear of the car, traced the outline with a Sharpie, and turned on my plasma cutter. It didn't take more than 5 minutes and I was holding the extremely damaged rear panel in my hands.


Here's what the rear of the car looked like with the panel removed.


As you can see, I've got some pretty serious rust in the trunk panel. If I could find a good replacement trunk floor I'd buy one and weld it in, but I've yet to source that part. With the panel roughly removed I then turned to my Dynabrade angle grinder with a metal flap disc in it, and began slowly grinding metal away, stopping short of the Sharpie outline I'd made.

As I progressed I was able to get to a point where the rear bumper mounts were nearly flush with the indentation in the panel, indicating I was getting close to where I needed to be. I was able to temporarily hold the panel in place by installing the bolts that hold the bumper to the body, but this is where it gets tricky. Obviously cutting too much metal out would be disastrous so I need to go very slowly, make lots of measurements, and trial fit the panel after each pass.

I've also bolted the trunk lid back on to check the shut lines where it meets the top of the rear panel. Over the next few days I'll keep working on fitting that rear panel. Then I'll remove the rust from the lip of the trunk floor where it butts up against the inner part of the panel, primer it and start welding the panel in. It's really rewarding to remove rusted and damaged metal from an old car, and also to fit the new panel in place. I decided to start with the rear because this panel is not nearly as complex as the front, and I hoped I'd learn something without making too many mistakes.


Speaking of the front of the car, I found a used grill on eBay that is not perfect, but which should be a good candidate for re-chroming, assuming I can figure out how to get the stainless steel slats out without ruining the part. It looks to be an original grill and has none of the quality control issues that I've found in the reproductions. After getting it chromed it will no doubt cost as much as a new reproduction part, but hopefully it will look and fit much better.

Ciao!